Mercury MIPC251C-4 Web Camera with ONVIF and PTZ Control
date
Jul 23, 2019
slug
mercury-ipc-onvif-ptz-control-script
status
Published
tags
HomeAssistant
ReverseEngineering
summary
Use Charles JADX WireShark reverse engineering Mercury MIPC251C-4 Web Camera App and admin web page to write a control script.
type
Post
TL;DR
Charles cannot capture packets.
APK decompile but no luck, control CMD implemented in JNI.
But WireShark can capture control packets for iOS app.
Login logic can be found in admin web page.
The Script: https://github.com/likaci/mercury-ipc-control

Overview
Recently, I found a Mercury IPC on SMZDM. Apart from supporting PTZ and night vision features, it also claims to support the ONVIF protocol. So I decided to buy one and add it to HomeAssistant for monitoring. However, after getting my hands on it, I realized that things weren't as simple as it seemed. Here are my findings.
Integrating with HomeAssistant
According to the HomeAssistant documentation on ONVIF Camera, integrating should be as simple as adding a couple of lines in the configuration file. But whether I used the default configuration or tried various ports on the backend page, I couldn't add the camera successfully.
Finally, using DSM Surveillance Station from Synology, I found the correct port. Later, I discovered that I could also find the correct port using iSpy. The port is 2020.
Here is the HomeAssistant configuration:
ONVIF and RTSP Parameters
ONVIF URL:
http://192.168.2.x:2020/onvif/device_service
RTSP 1920x1080 URL: rtsp://admin:pass@192.168.2.x:554/stream1
RTSP 640x480 URL: rtsp://admin:pass@192.168.2.x:554/stream2PTZ / Pan-Tilt-Zoom Control
After integrating with HomeAssistant and DSM Surveillance Station, I realized that PTZ control was not working. It seems that the claim of ONVIF support only applies to recording.
The rest of this article focuses on how to control the PTZ function.
Capturing Packets
I tried capturing packets using Charles, but the application didn't go through the configured proxy.
Decompiling the Android App
After unsuccessful attempts to capture packets using Charles, I tried decompiling the Mercury Security App. To my surprise, I found a lot of code related to
com.tplink.ipc, indicating that Mercury is indeed a sibling of TP-Link. The app is obfuscated, which makes it challenging to analyze.- Adding Local LAN Devices:
com.tplink.ipc.ui.device.add.DeviceAddByDeviceDetailInputFragment
- Login:
com.tplink.ipc.ui.device.add.DeviceAddByDeviceDetailInputFragment#xcom.tplink.ipc.core.IPCAppContext#devReqAddDevice(java.lang.String, int, java.lang.String, java.lang.String, int, int). ThedevReqAddDevicemethod calls a native function, and the actual implementation is found inlibIPCAppContextJNI.so. It seems that the network requests are made within the JNI code, making it difficult to capture them using Charles. Decompiling the.solibrary is not worth the effort, so let's try a different approach.
WireShark iOS Packet Capture
Using
rvictl, I can also capture packets over 3G/4G connections, which is useful for capturing packets related to issues that only occur in a 4G environment. Additionally, for devices that do not support setting up a proxy, I can enable the iPhone's personal hotspot and capture packets that way.To capture packets, run the following command:
rvictl -s 0000xxxx-00xxxxxxxxxxxxxxI discovered the network requests for the login and PTZ control steps:
Login
Retrieve
stok:Control
Use the obtained
stok to send POST requests:Summary
Currently, it seems that obtaining the
stok is the key to controlling the PTZ function. It can be obtained by capturing packets, but it seems to become invalid after the device restarts or after some time has passed (not confirmed).Obtaining stok
Although this camera has a web interface, it does not support PTZ control through the web. Therefore, in the initial packet capture, I did not consider the web interface. However, after analyzing the web interface, I found that the login verification process uses the same logic.
Here are the steps:
- Retrieve the RSA public key and nonce (both change every time)
- Encrypt the password
passwordastpPasswordusing TP-Link's universal encryption method
- Append
:noncetotpPasswordastpPassword:nonce
- Encrypt
tpPassword:nonceusing the public key asrsaPassword
- Send
rsaPasswordas the password for camera verification
Regarding steps 2 and 3, here is the record:
Encrypting Password as tpPassword Using TP-Link Encryption
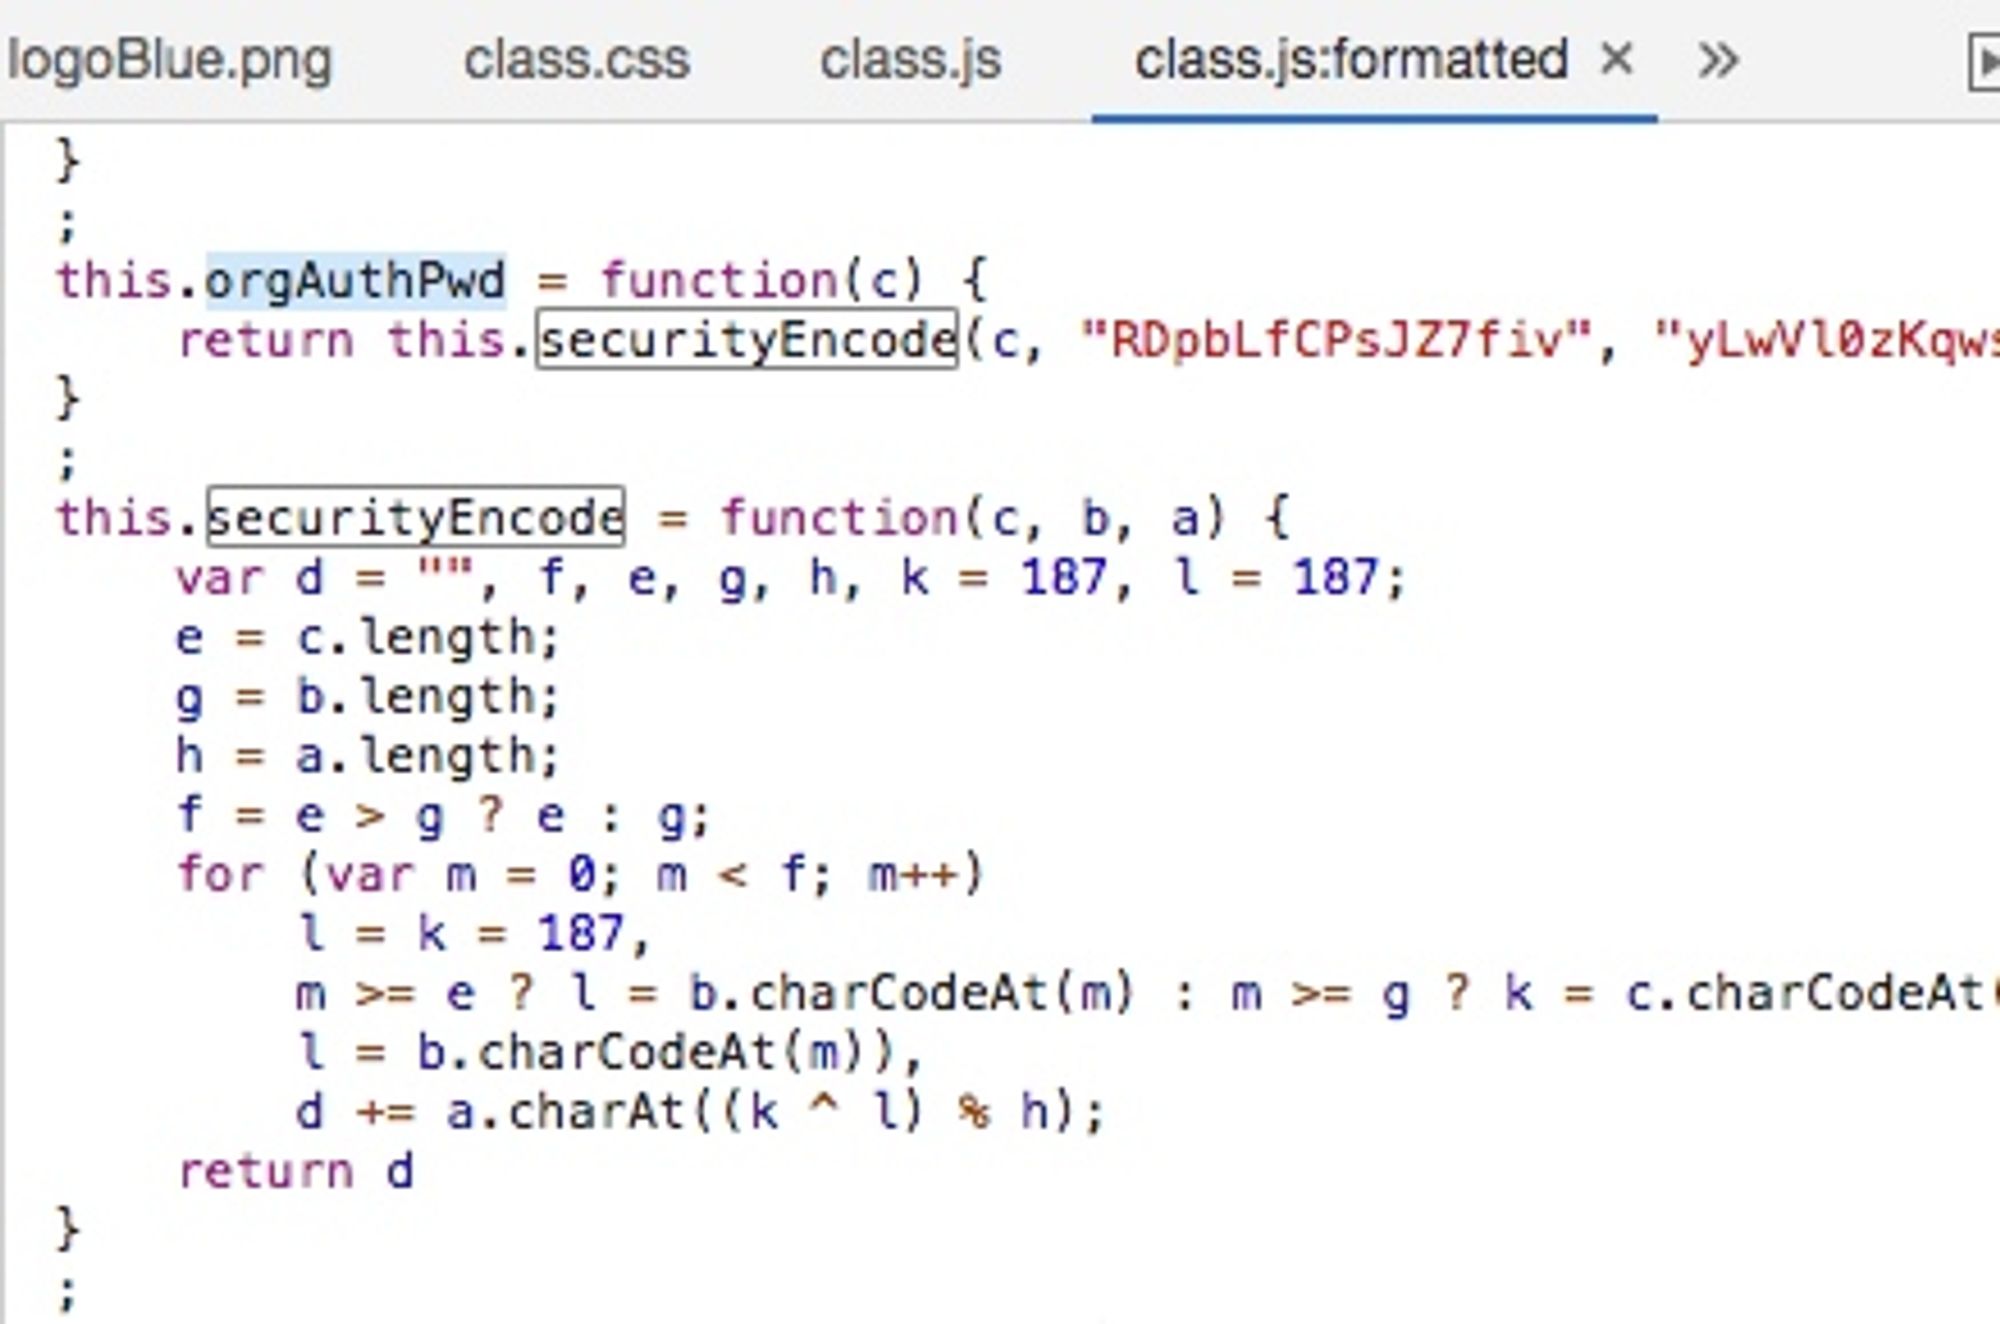
A search for "RDpbLfCPsJZ7fiv" reveals various implementations of this encryption method.
Encrypting tpPassword as rsaPassword Using RSA
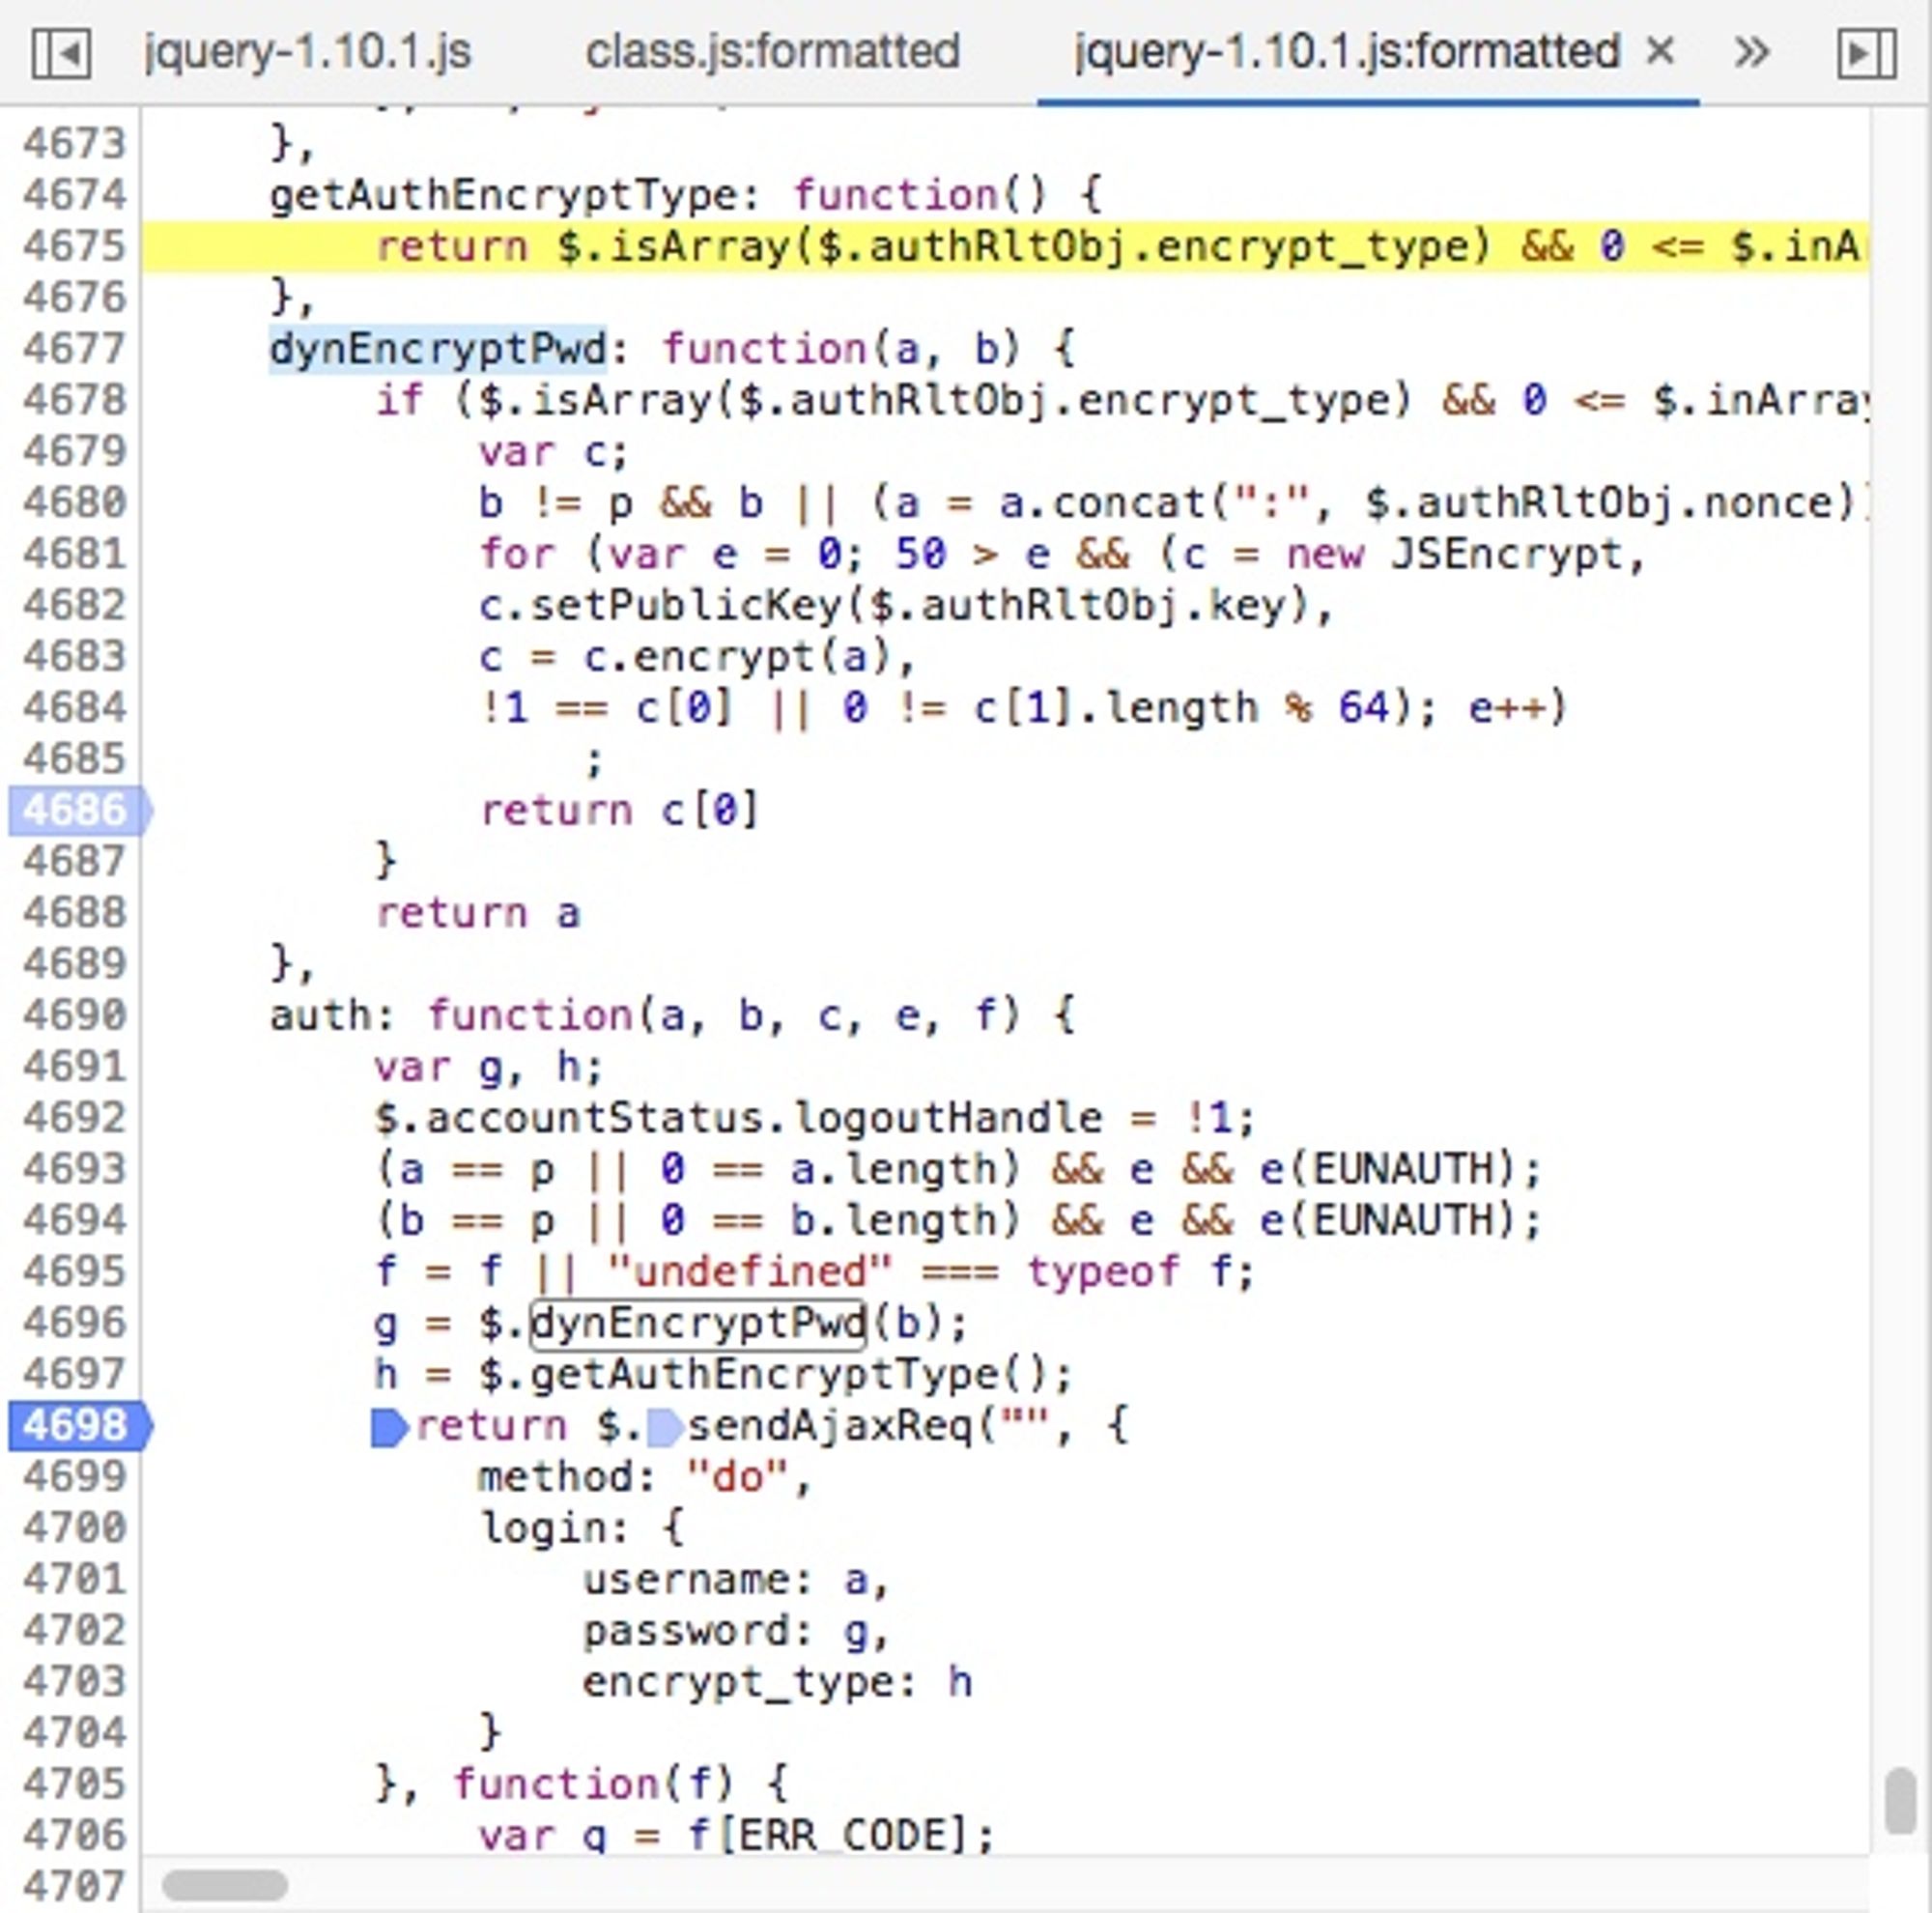
In the image,
a = a.concat(":", $.authRltObj.nonce) appends the nonce. c.setPublicKey($.authRltObj.key) sets the public key. The subsequent sendAjaxReq is thecontinuation of the process.The Script
Based on the analysis above, I have written a control script.